
If you are looking to remove the flow restrictor from your shower head, there are a few steps you need to take. First, you need to find where the flow restrictor is located. Then you need to know how to remove it.
Cleaning water restrictors improves water flow and pressure
If you have a low water pressure in your shower, there are a few things you can do to increase it. First, you may want to check out your water valve to see if it is working.
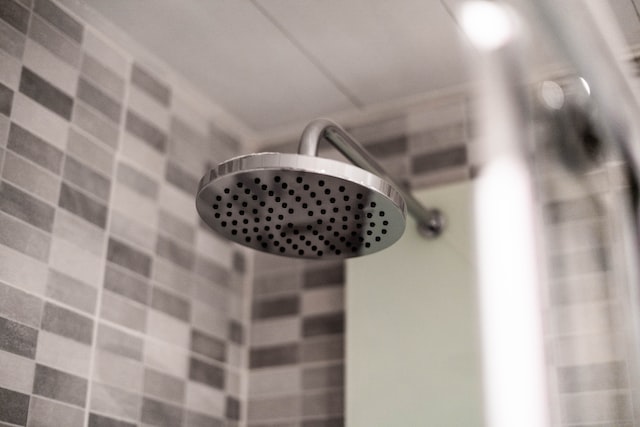
Photo by kevin Baquerizo on Unsplash
A water valve is usually located near the main supply line in your home. Most come with a red lever to control the flow of water. It may not be holding the maximum pressure, so it may need to be opened a little to allow the water to pass through.
Another reason you may have low water pressure is if your shower head has a water restrictor. Removing this restrictor can improve the water pressure.
Depending on your house, you may want to consider replacing your old pipes with new ones. This will help save you money in the long run. You can use copper or polyethylene for your new piping.
You can also install tap filters for your drinking water. These can help to remove sediment and other debris from your pipes, and eventually, you may need to replace them.
Having a clean showerhead can also increase water pressure. Debris can build up over time, so it’s important to regularly clean it. Some shower heads have screens that can be cleaned.
While you’re at it, you should make sure that the water filter is clean as well. The filter screen can easily be cleaned with a simple cleaning process.
Locating a flow restrictor in a showerhead
If you’ve been unable to get the shower you’ve been enjoying to work properly, you may want to find out if your shower head has a flow restrictor. Flow restrictors are designed to reduce the water output, and are a great way to help save on water and energy costs.
The process of finding and removing a flow restrictor is easy. It requires just a few basic tools and about ten minutes.
First, you need to unhook the hose from the diverter valve. You may have to use an adjustable wrench or pipe wrench to do this. Make sure you remove the hose with care.
Next, you need to loosen the restrictor. Often, this can be done with a paperclip. However, you can also use a flat-head screwdriver. Once the restrictor is loose, you can gently tug it out.
If you still can’t remove the restrictor, you might have to turn the shower arm upside down. Some models require an adjustable wrench, while others can be removed using hand pressure.
After removing the restrictor, you may have to replace the O-ring. In order to do this, you must remember to wrap it in a damp paper towel so that it doesn’t dry out.
Finally, you must put the shower back together. Depending on the type of shower head you have, the restrictor might be behind the screen.
Removing a flow restrictor from a handheld shower head
Removing a flow restrictor from a handheld shower head can be done with a few simple steps. Flow restrictors can reduce the water flow through the shower head by up to a half a gallon. This helps conserve water and save money on your utility bills.
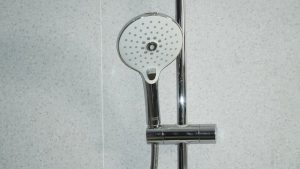
Photo by Noithat rakhoi on Unsplash
The flow restrictor is a small, circular piece of plastic material. The color of the restrictor will vary depending on the type of shower head. Normally, a bright orange color will appear in the middle of the restrictor.
Before removing the restrictor, you should check for leaks. Leaks could mean that the O-ring is cracked, causing the water to leak out.
If you notice a leak, it’s a good idea to replace the O-ring. This can be fairly inexpensive, but be careful not to damage the new O-ring when putting the shower unit back together.
If you don’t feel confident doing this task yourself, you can hire a plumber. This will ensure that you do not make a mistake. You can also buy replacement parts. It’s best to check your owner’s manual to find out where the restrictor is located.
Once you’ve removed the O-ring, the rest of the shower head is easy to take apart. A few tools are necessary, including a flat head screwdriver and a pipe wrench.